
Patreon, YouTube, Twitter, Facebook, Instagram, Spotify, iTunes
Hello!
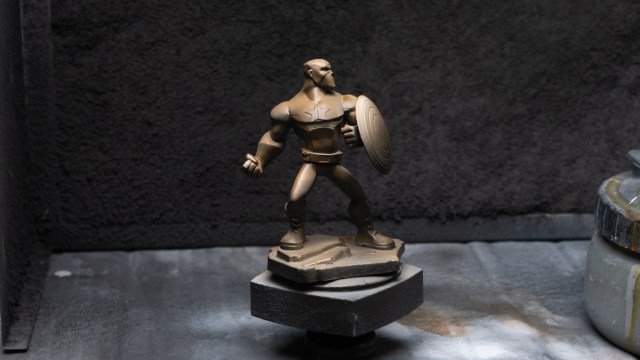
Last month I decided to turn one of the Disney Infinity toys into a statue to use as the centre piece for a new park-themed tile I’m currently working on for Marvel: Crisis Protocol, and in this post I’d like to share the process for doing so.

The “guide” is a little rough because I was more or less improvising as I went along, but will hopefully give you some ideas you might find useful should you wish to try something similar.
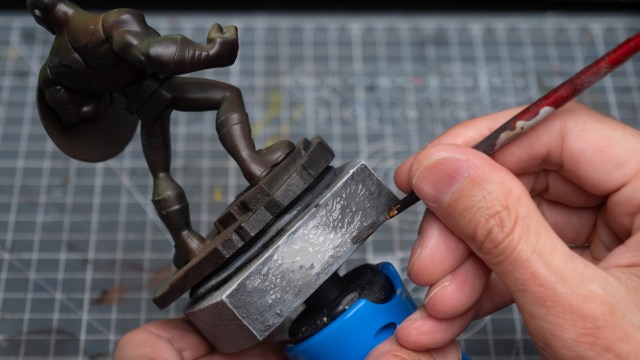
To begin with I stuck the figure down with super glue onto this lid from a face cream to create the plinth:

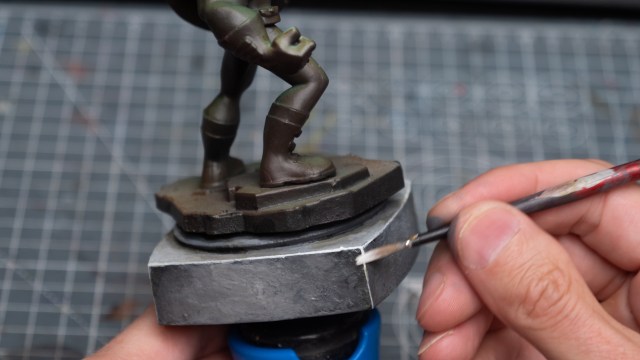
And here I’m just stippling on some filler (spackling paste) to create the stony texture:

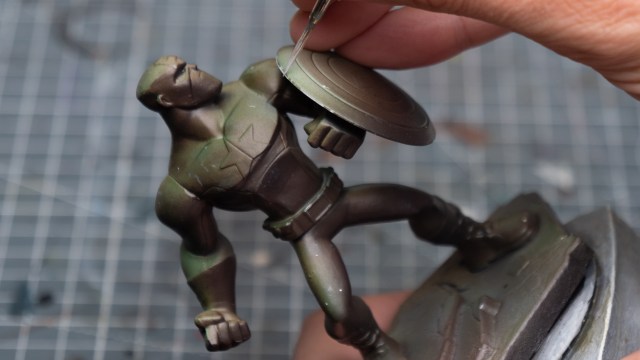
I then primed him in black followed with some grey and white zenithal highlights applied from above with the airbrush:

Next, I sprayed on some Sepia Ink by Daler Rowney. I thinned this with some water (maybe around 1 quarter water?) and sprayed it on in a couple of thin layers, taking care not to over spray which might cause the ink to run. You can see that the zenithal highlights have been nicely preserved:
Next I sprayed some of Daler Rowney’s Dark Green Ink quite lightly into the mid tones and highlights, and didn’t mind if it was a little irregular – so stronger in certain parts than others:

I then mixed a few of the other inks I’ve got to create a dark purple tone (I played with Indigo, Purple Lake, and Sepia, but any dark, purplish tone would be fine):


I sprayed this from a lower angle, up into the shadowed areas:

This gave me the nice range of colour modulation I was looking for:

Finally, to increase the depth in the strongest shadows, I applied a little Payne’s Grey:

This is a lovely blueish/purplish off black:

I shot this to some specific places only, such as the lowest part of the shield:

And here into the shadow on the lower back:

And that completes the actual statue – minus any weathering you may wish to add:

For the plinth, I used a grey scale of Stonewall Grey (VMA), Black, and Ivory:

I also applied a light dry brush to pick out the texture:

Followed with some thinned Shades (Agrax Eathshade and Athonian Camoshade) which I applied in quite a patchy way:

I then freely added a few spots of weathering using Ivory, greys, even a little Nihilakh Oxide etc:

And I’ve begun adding some posters and graffiti to the plinth:


I’ll probably add some more graffiti, but you get the idea!


And that’s it! I hope some of you found this post helpful. Of course there are many different ways you could paint the statue; you might prefer a more weathered, stony look like I did for these two:

I just need to finish off painting my “Daily Grind” coffee stand, and the new park area will be complete!

Watch out for more coverage of Marvel: Crisis Protocol from me soon, including painting guides for Green Gobin, Hella, Rocket, and M.O.D.O.K.
Stay safe, and Happy Painting!
Sorastro.
Captain America Disney Infinity Toy on Amazon (affiliate link – thank you!)